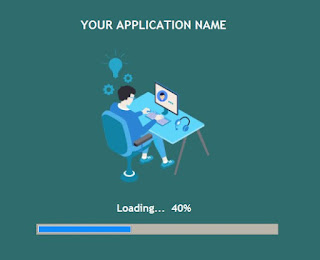
First impressions matter, especially in software applications. A well-designed loading screen not only enhances user experience but also provides feedback during startup processes. In this tutorial, we’ll explore how to create a dynamic loading screen using Python’s Tkinter library, complete with a progress bar and percentage indicator.
Why Use Tkinter for GUI Applications?
Tkinter is Python’s standard GUI library, offering simplicity and versatility for creating desktop applications. With Tkinter, you can design interactive interfaces without the need for external dependencies, making it an excellent choice for both beginners and experienced developers.
⏳ Why Loading Screens Matter
In today’s fast-paced digital world, users expect seamless experiences even during wait times. A well-designed loading screen:
✔ Improves perceived performance (makes waits feel shorter)
✔ Brands your application with custom visuals
✔ Provides crucial feedback about ongoing processes
✔ Prevents frustration during data-heavy operations
This updated guide will show you how to build:
✅ Animated progress bars with real-time updates
✅ Splash screens for app initialization
✅ Multi-threaded loading that keeps your UI responsive
✅ Modern visual effects (gradients, transparency)
✅ Customizable widgets to match your brand
Project Overview
Our loading screen will feature:
- A centered window with a fixed size.
- A progress bar that fills up over time.
- A percentage label that updates alongside the progress bar.
- Automatic transition to the main application window upon completion.
🛠️ What You’ll Need
- Python 3.10+ (Download here)
- Basic Tkinter knowledge
Pillowfor image handling (pip install pillow)- Recommended: VS Code or PyCharm
You Can Also Watch The Tutorial Video Below For More Understanding of how this Project works
Creating A Window
Let’s start by creating a window. It’s really quite simple using Tkinter. Let’s create a new python file called
main.py
from tkinter import * root = Tk() root.geometry('530x430') root.mainloop()
OUTPUT
In the first line inside the code snippets, we imported all the functions for the Tkinter module. Using
import * will import all. In the second line, we used “root” and assigned it to Tk() which is the standard name for initializing the Tk root widget. The root widget, which is the main window and our parent window, has to be created before any other windows. Also, there can be only one root. Then we gave our window a size using geometry with width: 900 and height: 600. Finally, the last line runs the main loop event .
Now, after running our window you will noticed that the window is not aligned exactly at the center of the screen. So let’s fix it.
from tkinter import *
root = Tk()
Making window align to the center
height = 430 width = 530 x = (root.winfo_screenwidth()//2)-(width//2) y = (root.winfo_screenheight()//2)-(height//2) root.geometry('{}x{}+{}+{}'.format(width, height, x, y))
root.mainloop()
You can download the starter code below to follow along
After downloading the starter code above follow along in the tutorial video below
PART ONE (1)
PART ONE (2)
Some Trending Python Projects you need to look at
Build a Modern Coffee Shop Management System with Python Tkinter and SQLite
Build a Modern Login and Sign-Up System with Python Tkinter and SQLite
Build a Sleek Python Tkinter Login Page: A Step-by-Step Guide
Build a Modern Student Registration System with Python Tkinter and SQLite
Conclusion
Creating a dynamic loading screen in Python using Tkinter enhances the user experience by providing visual feedback during application startup. By following this guide, you’ve learned how to:
- Initialize and center a Tkinter window.
- Add and update a progress bar and label.
- Transition smoothly from a splash screen to the main application window.
Implementing these features will give your applications a polished and professional touch.
If you have any questions or comments about this tutorial, please feel free to leave them in the comments section below.