Introduction
Ever wondered how to create applications with multiple windows using Python’s Tkinter library? Whether you’re building a complex GUI or simply want to organize your application better, understanding how to manage multiple windows is essential. In this guide, we’ll explore how to create and handle multiple windows in Tkinter effectively.
Why Use Multiple Windows in Tkinter?
Tired of cramming everything into a single window? Multiple windows make your Python apps more organized, user-friendly, and professional. Whether you’re building:
✔ Multi-form applications (login → dashboard)
✔ Popup dialogs (settings, alerts)
✔ Complex workflows (wizards, multi-step processes)
This updated guide will show you:
✅ How to open & close windows seamlessly
✅ Best practices for window management
✅ Modern UI tricks (because default Tkinter is bland)
✅ Common pitfalls & how to avoid them
Let’s dive in!
What You’ll Need
- Python 3.10+ (Download here)
- Basic Tkinter knowledge (widgets, event handling)
- A code editor (VS Code, PyCharm, or Thonny)
Understanding Tkinter’s Window Hierarchy
In Tkinter, the main application window is created using the Tk() class. Any additional windows are instances of the Toplevel class. It’s important to note that closing the main Tk() window will close all associated Toplevel windows as well.
Let’s start by creating a window. It’s really quite simple using Tkinter. Let’s create a new python file called window.py
This window will be the parent of all the other frames. The following code creates a new Tkinter application:
from tkinter import *

window = Tk()  # create a window widget
window.rowconfigure(0, weight=1)
window.columnconfigure(0, weight=1)
window.state("zoomed")

window.mainloop()
The window.rowconfigure(0, weight=1) and window.columnconfigure(0, weight=1) Lines configure the rows and columns of the main window to have a weight of 1, which allows the window to expand and fill the available space. The window.state(‘zoomed’) line sets the state of the window to “zoomed”, which means that the window will take up the entire screen when it is opened.
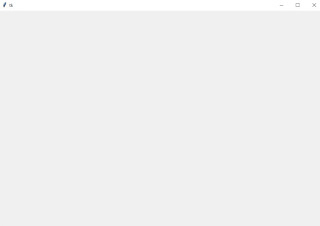
OUTPUT:

A blank empty window
Next, three frames are created using the Frame() function, page1, page2, and page3. These frames will be used to display different pages of the application. The frames are then added to the main window using the grid() method. The grid() method is a geometry manager that organizes widgets in a grid-like layout. The for loop and the sticky=’nsew’ argument ensure that the frames will take up the entire space of the main window.
The show_frame() function is then defined. This function takes in a frame as an argument and raises it to the top of the stacking order using the tkraise() method. This allows the frame to be displayed on top of the other frames and become the active frame.
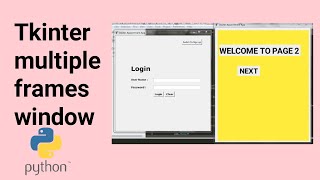
The code then proceeds to create different widgets (labels, entries, buttons) for each frame and places them in specific coordinates using the place() method. The widgets for page1 include a label for the username, an entry for the username, a label for the password, an entry for the password, and a button for LOGIN. The widgets for page2 include a label for “WELCOME TO PAGE 2” and a button for NEXT. Similarly, the widgets for page3 include a label for “WELCOME TO PAGE 3” and a button for NEXT.
Finally, the show_frame() function is called with page1 as the argument, which sets page1 as the initial active frame when the program runs. The buttons on each frame are also given commands using the command parameter, which call the show_frame() function and display the corresponding frame when clicked. This allows the user to navigate between the different pages of the application.
page1 = Frame(window)
page2 = Frame(window)
page3 = Frame(window)

for frame in (page1, page2, page3):
    frame.grid(row=0, column=0, sticky='nsew')

def show_frame(frame):
    frame.tkraise()

show_frame(page1)

# ============= Page 1 =========
pag1_label = Label(page1, text='Username', font=('Arial', 15, 'bold'))
pag1_label.place(x=50, y=100)

pag1_entry = Entry(page1)
pag1_entry.place(x=170, y=106)

pag1_label2 = Label(page1, text='Password', font=('Arial', 15, 'bold'))
pag1_label2.place(x=50, y=150)

pag1_entry2 = Entry(page1)
pag1_entry2.place(x=170, y=155)

pg1_button = Button(page1, text='LOGIN', font=('Arial', 13, 'bold'), command=lambda: show_frame(page2))
pg1_button.place(x=170, y=200)

# ======== Page 2 ===========
page2.config(background='yellow')
pag2_label = Label(page2, text='WELCOME TO PAGE 2', font=('Arial', 30, 'bold'))
pag2_label.place(x=50, y=100)

pg2_button = Button(page2, text='NEXT', font=('Arial', 13, 'bold'), command=lambda: show_frame(page3))
pg2_button.place(x=190, y=400)

# ======== Page 3 ===========
page3.config(background='gray')
pag3_label = Label(page3, text='WELCOME TO PAGE 3', font=('Arial', 30, 'bold'))
pag3_label.place(x=50, y=100)

pg3_button = Button(page3, text='NEXT', font=('Arial', 13, 'bold'), command=lambda: show_frame(page1))
pg3_button.place(x=190, y=400)
You can download the source code below
For more clarity, You can watch full tutorial video on YouTube
Best Practices for Multi-Window Applications
- Use
Toplevelfor Truly Separate Windows: When you need a completely separate window (like a settings dialog), useToplevel. - Use Frames for Multi-Page Interfaces: For applications that require multiple pages or views within the same window, stacking frames and raising them as needed is more efficient.
- Manage Window and Frame References Carefully: Keep track of your windows and frames to avoid memory leaks or orphaned widgets.
- Consider Using Classes: Encapsulating your windows and frames within classes can make your code more organized and reusable.
Conclusion
Mastering multiple windows and frames in Tkinter allows you to build more complex and user-friendly GUI applications. By understanding when to use Toplevel windows versus frames, you can design applications that are both functional and intuitive.
If you have any questions or comments about this tutorial, please feel free to leave them in the comments section below.
Some Trending Python Projects you need to look at
Build a Modern Coffee Shop Management System with Python Tkinter and SQLite
Build a Modern Login and Sign-Up System with Python Tkinter and SQLite
Build a Sleek Python Tkinter Login Page: A Step-by-Step Guide
Build a Modern Student Registration System with Python Tkinter and SQLite
Disclaimer
Sengideons.com does not host any files on its servers. All point to content hosted on third-party websites. Sengideons.com does not accept responsibility for content hosted on third-party websites and does not have any involvement in the same.


